
Affiliate Disclosure: Some of the links in this post are affiliate links. This means we may earn a small commission if you make a purchase through these links—at no extra cost to you. We only recommend products and tools that we genuinely believe will help you with your sewing projects.
You’ll master essential sewing fundamentals faster with skirts than any other beginner garment. Their straightforward construction—elastic waistbands, straight seams, and minimal pattern pieces—lets you focus on accurate measuring, pinning, and pressing without fitted bodices or complex sleeves. Gathered and wrap skirts require minimal fabric, finish in under an hour, and offer customizable fits through adjustable waistband techniques. You’re building reliable technical competence while creating wearable garments. The specifics of calculating dimensions, selecting appropriate fabrics, and avoiding common construction mistakes await you further.
Key Takeaways
- Gathered skirts require minimal fabric (one yard) and can be completed in under an hour with straightforward construction techniques.
- Essential supplies include fabric, matching thread, elastic waistband, safety pin, and accurate measuring instruments for proper fit.
- Calculate waist width as hip measurement × 0.25 + 2 inches and hem width as hip measurement × 0.5.
- Use straight stitches for seams and zigzag stitches to prevent fraying, especially when working with stretchy knit fabrics.
- A-line skirts serve as ideal entry-level projects that bridge beginner and advanced techniques while building sewing confidence.
Why Beginners Choose Skirts as Their First Project
When you’re starting your sewing journey, skirts offer an ideal entry point because they combine simplicity with rewarding results.
You’ll find that skirt patterns feature straightforward construction techniques—primarily straight seams and elastic waist insertions—that establish foundational skills you’ll use throughout your sewing career. These patterns accommodate adjustable measurements, enabling you to customize the fit to your specific body dimensions without complex alterations.
The variety of styles available, from gathered to pencil designs, allows you to select beginner sewing projects matching your skill level and aesthetic preferences. You can complete most skirts in under an hour using inexpensive, stretchy knit fabrics, making them budget-friendly first projects.
This accessibility transforms skirts into the perfect gateway for developing your technical competence and building confidence in your sewing abilities.
Gathering Your Supplies: The Essentials Checklist
You’ll need to select 2 yards of fabric adjusted for your hip measurements, paired with matching thread that complements your chosen material.
You should gather elastic supplies like Dritz’s soft waistband elastic (typically 1.5 inches wide), a safety pin for threading, and basic sewing hardware.
Essential tools you’ll require include accurate measurement instruments for waist and hip sizing, plus a reliable sewing machine set for a 1/2-inch seam allowance throughout your project.
Fabric And Thread Selection
Selecting the right materials forms the foundation of a successful skirt project. You’ll need to carefully evaluate your options to guarantee a polished, durable finished garment.
Consider these essential selections:
- Fabric choice: Opt for medium-weight knit fabrics like ponte knit or cotton-lycra blends that provide comfort and durability.
- Thread matching: Select thread that complements your fabric color for a seamless, professional finish.
- Waistband elastic: Choose 1.5″ soft waistband elastic, such as Dritz’s brand, for a comfortable and secure fit.
- Threading tool: Include a safety pin to streamline the elastic threading process through the waistband.
Your fabric selection directly impacts the skirt’s drape, stretch, and longevity.
Matching thread guarantees invisible seams that enhance your garment’s appearance. Quality waistband elastic combined with proper installation techniques assures comfort during wear.
Elastic And Hardware Supplies
The right elastic and hardware components make or break your skirt’s comfort and durability. You’ll need 1.5″ wide soft waistband elastic—Dritz offers quality options—sized appropriately for your waist measurement. This width guarantees comfortable wear without rolling or bunching during extended use.
Thread matching your fabric is non-negotiable for achieving a polished finish throughout construction. Select thread that complements your sewing pattern’s aesthetic seamlessly.
A safety pin becomes invaluable when threading elastic through your waistband casing, facilitating smooth insertion and enabling easy adjustment without frustration.
For finishing edges, incorporate zig-zag stitching or French seams into your sewing pattern to prevent fraying and secure fabric integrity.
Maintain consistent 1/2″ seam allowances throughout your project for precise construction and ideal fit alignment with your original sewing pattern specifications.
Tools And Measurement Instruments
Before cutting fabric or threading your machine, five fundamental tools form the foundation of successful skirt construction: fabric scissors, a measuring tape, pins, a sewing machine, and a seam ripper for inevitable corrections.
Precise measurements determine your skirt’s success. You’ll need:
- Waist measurement: Measure snugly around your natural waistline
- Hip measurement: Measure around the fullest part of your hips, typically 7-9 inches below your waist
- Desired skirt length: Measure from your waist to your preferred hem point
- Seam allowances: Add half-inch margins to all pattern pieces
Use your measuring tape to record each dimension accurately. Fabric scissors guarantee clean cuts through medium-weight material without fraying edges.
Pins secure pattern pieces and fabric layers during construction. A sewing machine provides consistent, durable stitching.
These tools work together to create a properly fitted, professionally finished garment.
Taking Accurate Measurements for Your Skirt
You’ll need to record three essential measurements: your natural waist, the widest part of your hips, and your desired skirt length from waist to hemline.
Once you’ve gathered these baseline measurements, you’ll adjust them using specific formulas—calculating waist width as hip measurement × 0.25 + 2 inches and hem width as hip measurement × 0.5—to determine your pattern dimensions.
You can then fine-tune these calculations by adding or subtracting an inch from the waist or hem width, depending on whether you’re seeking a slimmer fit or more streamlined silhouette.
Essential Measurements to Record
Three critical measurements form the foundation of any well-fitting skirt: length, hip circumference, and waist width.
You’ll need to record these essential metrics for a fitting skirt:
- Skirt length: Measure from your natural waist down to your desired hem, accounting for style preferences.
- Hip circumference: Measure the widest part of your hips to guarantee accurate fit.
- Waist width: Calculate using the formula—hip measurement × 0.25 + 2 inches.
- Hem adjustments: For a slimmer fit, add 1 inch to waist width and subtract 1 inch from hem width.
You’ll document these measurements carefully before starting your skirt DIY project.
Accurate recordings prevent sizing issues and confirm your final garment fits comfortably and flatters your silhouette.
Double-check each measurement twice for precision.
Adjusting Measurements for Fit
Once you’ve recorded your basic measurements, the next step involves refining them to match your personal fit preferences and sewing specifications.
You’ll calculate your skirt waist width using the formula: hip measurement multiplied by 0.25, plus 2 inches. For a midi skirt or closer fit, adjust by adding 1 inch to the waist width and subtracting 1 inch from the hem width.
When sewing, always incorporate a 1/2-inch seam allowance into your calculations to guarantee proper final dimensions. Measure your desired skirt length from your natural waist to your preferred hemline for personalization.
These adjustments for fit ensure your garment drapes correctly and accommodates your body’s unique proportions before you begin cutting fabric.
Choosing Fabric: Knits, Wovens, and What Works for Beginners
Selecting the right fabric is fundamental to your skirt’s success, and it’ll determine both how easily you can construct your garment and how well it performs once worn.
You’ll find that different fabric types require varying skill levels:
- Knits like ponte or cotton-lycra blends offer stretchability, providing comfort and ease ideal for beginners.
- Woven fabrics such as cotton or denim demand more precise sewing techniques since they don’t stretch.
- Medium weight fabrics maintain structure while simplifying construction for novice sewers.
- Thinner rayon jerseys create flowing designs but challenge beginners due to curling and shifting.
Before starting, pre-wash and iron your fabric to prevent shrinkage and guarantee smooth sewing.
This preparation step directly impacts your project’s success and final fit.
Calculating Your Skirt Dimensions Step by Step
How do you translate your body measurements into accurate skirt dimensions?
Start by calculating your Skirt Waist Width using this formula: multiply your hip measurement by 0.25, then add 2 inches for ease and seam allowance. For a Pencil Skirt, add 1 inch to this calculation for a slimmer fit.
Next, determine your Hem Width by multiplying your hip measurement by 0.5. If you’re creating a fitted style, subtract 1 inch from this measurement.
Measure your Length from your natural waist down to your desired hem—whether that’s a knee-length skirt or an everyday Maxi.
Don’t forget to account for a 1/2-inch seam allowance throughout your entire project to guarantee precise sizing and proper fit.
Laying Out and Cutting Your Fabric Correctly
You’ll need to prepare your fabric by folding it as it comes off the bolt to guarantee symmetrical pieces. Then mark your cutting lines using fabric chalk based on your calculated waist and hem widths and desired length.
Before making any cuts, you should double-check all measurements and use a rotary cutter or sharp fabric scissors to achieve clean, accurate edges.
If your hip measurement exceeds your folded fabric width, you’ll need to either source wider fabric or cut four skirt pieces instead of two to accommodate your dimensions.
Preparing Your Fabric Properly
Three critical preparation steps—pre-washing, pressing, and accurate layout—establish the foundation for successful skirt construction.
Pre-wash your fabric to prevent post-sewing shrinkage and maintain dimensional stability.
Press thoroughly to create a smooth cutting surface that guarantees precision.
When you’re ready to cut, fold your fabric in half with right sides together, which produces symmetrical skirt pieces efficiently.
- Align the grain line parallel to your cutting pattern for ideal drape and fit
- Position pattern pieces on the fold where indicated to maintain garment symmetry
- Secure patterns with pins to minimize fabric shifting during cutting
- Use sharp fabric scissors or a rotary cutter for clean, professional edges
This methodical approach prevents costly mistakes and guarantees your gathered skirt components are cut accurately for proper construction.
Measuring And Marking Guidelines
Before cutting your fabric, accurate measurements establish the foundation for a properly fitted skirt. You’ll measure from your natural waist to your desired length—whether that’s midi length or your favorite skirt style.
Take hip measurements around the widest part to calculate waist width (Hip x 0.25 + 2) and hem width (Hip x 0.5).
When laying out fabric, you’ll cut two skirt pieces on the fold for symmetry. Draw an angled line from waist width to hem width, creating your desired silhouette.
Use a 1/2″ seam allowance consistently, keeping seams open initially for pressing. This technical precision guarantees uniform fit and professional results throughout your sewing project.
Cutting Techniques For Accuracy
Proper fabric preparation is essential for achieving clean, accurate cuts. Before you begin cutting your skirt pattern—whether it’s a pleated button style or DIY jean pants made from a cable weave—follow these critical steps:
- Lay your fabric flat on a clean, even surface, guaranteeing proper folding and alignment to prevent misalignment.
- Mark all pattern pieces precisely using tailor’s chalk or fabric markers, following grainlines and notches.
- Use sharp scissors or rotary cutters appropriate for your fabric type to minimize fraying.
- Maintain a consistent 1/2 inch seam allowance throughout all cuts.
If your measurements exceed the folded fabric width, cut additional pieces to preserve design integrity.
This methodical approach guarantees your skirt components fit together seamlessly during construction, eliminating costly rework and frustration.
Sewing Straight Seams: Your Foundation Skill
Mastery of straight seams forms the backbone of skirt construction, and you’ll rely on this fundamental technique throughout virtually every garment project you undertake. You’ll achieve accuracy by maintaining a consistent 1/2″ seam allowance, which guarantees neat edges and professional results.
| Technique | Purpose | Benefit |
|---|---|---|
| Pinning fabric pieces | Prevent shifting during stitching | Maintains alignment and consistency |
| Straight stitch | Standard seam construction | Reliable, clean seams |
| Zigzag stitch | Prevent fraying | Enhances durability, especially for knits |
| Pressing seams open | Flatten and set stitches | Maintains shape and polished finish |
You’ll pin your fabric pieces together before sewing to prevent movement. While straight stitches work well for most skirts, you’ll consider zigzag stitching for knit materials to prevent fraying. Finally, you’ll press seams open after sewing to flatten the fabric and preserve your skirt’s structural integrity.
French Seams vs. Zigzag: Which Finish to Use
You’ll find that French seams offer superior durability and a polished interior finish, making them ideal for skirts you’ll wear frequently.
However, they require an extra sewing step that may challenge beginners. If you’re prioritizing speed and ease, zigzag stitches provide a practical alternative that you can apply directly to raw edges without additional passes.
Your choice ultimately depends on whether you’re willing to invest extra time for a more refined garment or prefer a faster approach that still effectively prevents fraying.
French Seams For Durability
Because raw fabric edges can unravel and compromise your skirt’s longevity, selecting the right seam finish is critical for beginners. French seams provide superior durability by encasing raw edges completely, unlike zigzag stitching that merely overlocks them.
Here’s why you’ll benefit from French seams:
- They strengthen your garment through double stitching
- They eliminate fraying that weakens seams over time
- They’re ideal for lightweight, non-stretch skirt fabrics
- They offer professional aesthetics while ensuring longevity
You’ll create French seams by sewing wrong sides together first, trimming excess allowance, then folding right sides together and stitching again.
This structured approach locks raw edges within the seam, preventing deterioration from washing and wear. For beginners seeking durable, polished results, French seams deliver both reliability and visual sophistication that justifies the extra effort.
Zigzag Stitch Simplicity
Simplicity and practicality distinguish the zigzag stitch as the preferred finish for stretchy fabrics where French seams would restrict elasticity. You’ll appreciate how this technique preserves your fabric’s recovery while preventing fraying effectively.
| Feature | Zigzag Stitch | French Seam |
|---|---|---|
| Fabric Type | Knits, stretchy materials | Lightweight wovens |
| Stitch Length | Longer setting required | Standard length |
| Elasticity Retention | Maintains stretch | Restricts movement |
| Complexity | Quick, straightforward | More involved |
| Bulk | Minimal | Increased |
When you’re working with knits, you’ll set your machine to accommodate fabric stretch by lengthening the stitch. This adjustment allows the thread to flex with your garment, ensuring durability without compromising comfort. You’ll find zigzag stitching ideal for everyday skirts requiring flexibility and quick construction without sacrificing quality.
Pinning and Sewing Your Side Seams
Position your skirt pieces with right sides facing each other, aligning the side edges precisely before you begin pinning.
Position skirt pieces with right sides facing, aligning side edges precisely before pinning begins.
Start pinning from the top waistband and work downward, securing the fabric layers at regular intervals. This approach guarantees even alignment throughout the seam.
Here’s your sewing process:
- Pin sides securely using evenly spaced pins perpendicular to the edge
- Maintain a consistent 1/2″ seam allowance as you sew
- Select a zigzag stitch to accommodate fabric stretch and prevent seam breakage
- Press seams open after sewing to minimize bulk and improve drape
Once you’ve completed the stitching, finish raw edges using either French seams or a zigzag stitch.
This vital step prevents fraying and greatly extends your skirt’s longevity. Proper finishing techniques distinguish professional results from amateur construction.
Drafting Your Waistband
You’ll need to measure your waist accurately and calculate your elastic length properly to guarantee your waistband fits comfortably and securely.
Start by determining your skirt’s waist width using the formula (Hip × 0.25 + 2), then add 3 cm to your waist measurement for elastic overlap when sewing the ends together.
Finally, you’ll attach the waistband to your skirt by distributing the fabric evenly around the elastic for a balanced, polished finish.
Measuring Your Waist Accurately
Before you draft your waistband pattern, you’ll need to take an accurate waist measurement using a flexible measuring tape positioned around the narrowest part of your waist, typically just above your belly button.
To guarantee precision, follow these essential steps:
- Stand comfortably while measuring to capture your natural waist position.
- Keep the tape level and snug without restricting your breathing.
- Remove bulk clothing that’d distort your measurement.
- Record your measurement for pattern calculations.
Once you’ve obtained your waist measurement, subtract 4 cm to account for elastic stretch and achieve a snug, comfortable fit.
Next, divide this adjusted measurement by four to determine your waistband pattern piece width. Remember to add appropriate seam allowances during assembly for proper construction and professional results.
Calculating Elastic Length Properly
With your waist measurement finalized, you’re ready to determine the correct elastic length for your waistband. Start by subtracting 3 cm from your waist measurement to account for the overlap when you sew the elastic ends together. When measuring, stretch the elastic slightly to guarantee it’ll provide a snug, comfortable fit without excessive tightness.
Next, mark the quarter points on both the elastic and waistline using a fabric pen or tailor’s chalk. These marks facilitate even distribution during sewing and prevent bunching.
Finally, fold your waistband over the elastic and attach it using a zigzag stitch, which adds stretchability. Maintain consistent tension throughout to achieve a smooth, polished finish that hides raw edges and creates a professional appearance.
Attaching Waistband To Skirt
Now that your elastic’s secured properly, it’s time to draft and attach your waistband.
Start by measuring your hip and calculating the waistband width: Hip × 0.25 + 2 inches. Cut two waistband pieces on the fold, each measuring 3″ by this calculated width.
Follow these essential steps:
- Press both pieces wrong sides together lengthwise for a polished finish
- Stitch the 3″ edges together to form a complete circle
- Pin the waistband to your skirt with right sides together, aligning all raw edges
- Sew securely using consistent stitching
Before final assembly, test your elastic fit over the waistband—it should feel snug yet comfortable.
Once confirmed, thread the elastic through, overlap the edges, and sew them together securely. This technique guarantees even fabric distribution and maintains your waistband’s structural integrity throughout wear.
Attaching the Waistband to Your Skirt
You’re ready to attach the waistband, which is typically the final step before finishing your skirt’s interior seams. Begin by quarter marking both pieces to guarantee even fabric distribution. Align the raw edges of your waistband with the skirt’s raw edges, positioning right sides together.
| Step | Action | Result |
|---|---|---|
| 1 | Sew with 1/2″ seam allowance | Secure attachment |
| 2 | Press seam upward | Neat finish |
| 3 | Fold waistband down | Enclose raw edges |
Sew along the marked quarters using a consistent 1/2″ seam allowance for ideal security. After stitching, press the seam allowance upward toward the waistband. Finally, fold the waistband down over the seam, enclosing all raw edges, and stitch close to the folded edge to secure it permanently in place.
Measuring and Threading Elastic the Right Way
After securing your waistband to the skirt, you’ll need to insert elastic to create the finished waistline. Proper measurement and threading guarantee comfort and durability.
Follow these essential steps:
- Measure your waist, stretch slightly, then add 3 cm for overlap when joining the elastic ends.
- Quarter mark both the elastic and waistline to ensure even distribution and consistent tension.
- Use a safety pin to thread the elastic through the waistband channel, preventing twists and snags.
- Overlap elastic edges by 1-2 cm and securely sew them together to prevent slippage during wear.
Before permanently securing the elastic, distribute it evenly along the entire waistband. This critical step maintains uniform tension throughout, eliminating uncomfortable bunching or loose spots that compromise the skirt’s fit and longevity.
Securing Your Elastic for a Comfortable Fit
Once you’ve threaded the elastic through the waistband channel and distributed it evenly, you’ll secure it with a zigzag stitch that accommodates the elastic’s natural stretch.
Start sewing at one of your quarter marks, maintaining consistent tension as you work around the waistline. Stretch the elastic slightly as you sew, pulling the fabric taut to eliminate wrinkles and guarantee even distribution. This technique prevents bunching and creates a smooth, professional appearance.
Complete your stitching by overlapping your starting point by approximately 2 centimeters for durability.
Once finished, press the waistband flat with an iron to set the stitches and remove any creases. This final pressing step assures a polished, finished look that’ll enhance your skirt’s overall appearance and comfort.
Hemming Your Skirt by Hand or Machine
You’ll want to decide between hand hemming with a slip stitch for an nearly invisible finish and machine hemming with either a straight or zigzag stitch, each method offering distinct advantages depending on your skill level and desired outcome.
Hand hemming requires you to catch only a few threads for security without visible stitching, while machine methods benefit from a 1/2″ allowance that reinforces your edges evenly. Your choice of tool—whether needle, sewing machine, or serger for raw edge finishing—ultimately depends on the polished appearance you’re aiming to achieve and the time you’re willing to invest.
Hand Hemming Techniques
The foundation of a polished skirt lies in your hemming method, whether you’re stitching by hand or machine. Hand hemming offers superior aesthetic results through careful technique execution.
When hand hemming, you’ll:
- Fold the fabric edge under and press it to create a crisp crease
- Use a slip stitch for nearly invisible stitches on the garment’s front
- Press the hem before and after sewing to maintain shape integrity
- Stitch through the folded edge, capturing only a few threads from the skirt’s body
This meticulous approach yields a professional finish that machine methods struggle to replicate.
The slip stitch technique proves particularly effective because it hides thread within the fold, creating an imperceptible seam. While hand hemming demands patience and precision, the refined appearance justifies the investment of time for beginners seeking quality craftsmanship.
Machine Stitching Methods
Machine stitching offers efficiency and consistency when you’re hemming your skirt, with method selection depending on your fabric type. You’ll achieve ideal results by matching your stitch type and settings to your material’s characteristics.
| Fabric Type | Recommended Stitch | Stitch Length |
|---|---|---|
| Woven | Straight stitch | Standard |
| Knit | Zigzag stitch | Standard |
| Lightweight | Straight stitch | Longer |
| Medium-weight | Straight stitch | Standard |
| Stretchy knit | Zigzag stitch | Standard |
You’ll use a 1/4″ to 1/2″ seam allowance for woven fabrics to guarantee a clean finish. For knits, employ a zigzag stitch to maintain elasticity and prevent seam breakage. Consider implementing a double-fold hem technique, folding your raw edge twice and stitching it down, which prevents fraying and delivers professional results. This method produces a neat, durable finish suitable for various garment weights.
Choosing Your Hemming Tool
One’s choice between hand and machine hemming depends on fabric delicacy, desired finish quality, and personal preference. You’ll find each method offers distinct advantages for your skirt project.
Hand hemming delivers nearly invisible finishes ideal for delicate fabrics. Consider these hemming options:
- Slip stitch for seamless, professional results on lightweight materials
- Blind hem stitch creating virtually undetectable seams on silk or chiffon
- Machine straight stitch producing clean, durable edges on stable fabrics
- Twin needle technique offering professional parallel stitching on knits with zigzag backing
For machine work, you’ll use straight stitches for standard fabrics and zigzag stitches for knit prevention of fraying.
Maintain consistent hem width—typically 1/4 inch to 1 inch—using a measuring gauge. Pin or baste beforehand ensuring fabric remains stable throughout stitching, preventing shifting that compromises your hem’s integrity and appearance.
What You’ve Now Mastered: Your Skill Foundation
Your foundation in skirt sewing now encompasses multiple essential competencies that’ll enable you to create polished garments independently.
You’ve mastered accurate measurement techniques—waist, hip, and length calculations—which directly impact fit quality. You understand pattern drafting fundamentals, including fabric folding, seam allowance marking, and cutting calculations tailored to your dimensions.
Your technical skillset includes straight stitching, zigzag stitching, and elastic waistband application, all critical for professional finishes. You’ve developed proficiency across gathered, pencil, and wrap skirt variations, expanding your design repertoire.
Additionally, you’ve learned to leverage online resources and printable patterns effectively, enabling continuous skill refinement.
These competencies position you to execute projects with confidence, troubleshoot construction challenges, and progressively tackle more complex sewing endeavors while maintaining garment quality and personal satisfaction.
A-Line Skirts: Your Next Natural Step
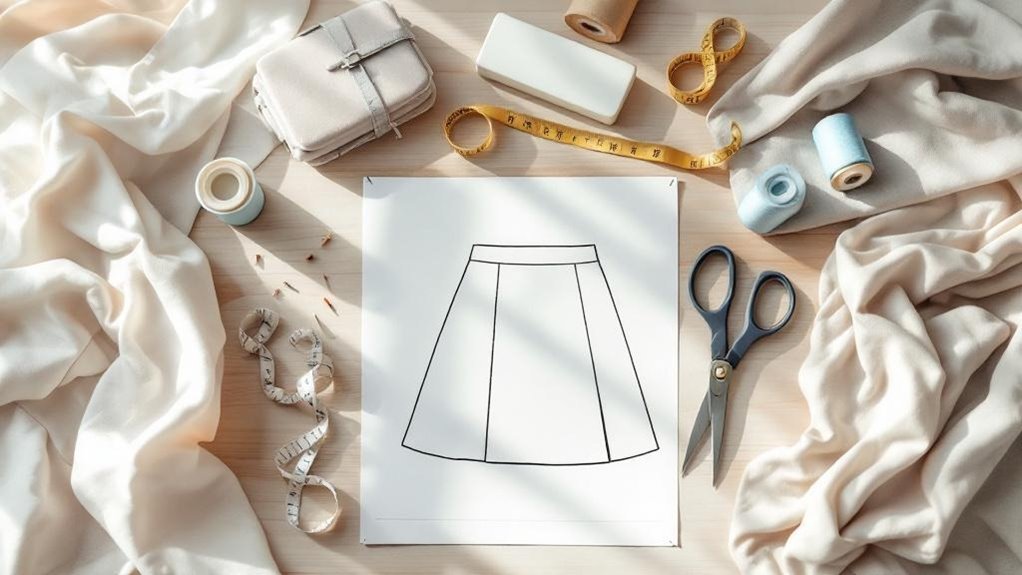
The A-line silhouette represents a natural progression in your sewing journey, building directly on the foundational skills you’ve already developed. This flattering design widens gradually from waist to hem, suiting diverse body types while remaining accessible for intermediate sewers.
You’ll appreciate A-line skirts for their practical advantages:
- Basic construction: Employ straight stitching and simple seam finishes you’ve already mastered
- Customizable waistbands: Choose elastic or button closures for personalized comfort and fit
- Fabric versatility: Work with cotton, denim, or lightweight knits across seasons
- Length flexibility: Modify patterns for mini, knee-length, or midi styles effortlessly
These patterns bridge the gap between beginner and advanced techniques, reinforcing your existing skills while introducing subtle shaping.
You’ll develop confidence in garment construction without overwhelming complexity, making A-line skirts an ideal next project.
Circle Skirts for Movement and Flow
After mastering the A-line’s foundational techniques, you’re ready to explore circle skirts—a design that’ll expand your construction skills through a fundamentally different approach to garment shaping.
Circle skirts require only a single pattern piece, greatly streamlining your cutting and assembly process. You’ll calculate the radius from your waist measurement to create the characteristic flowing silhouette that enables unrestricted movement and dramatic twirling.
The adjustable length—ranging from mini to maxi—adapts to your preferences through simple hemline modifications. You can construct circle skirts from diverse fabrics: lightweight cottons for summer comfort or heavier materials for winter insulation.
Most tutorials incorporate elastic waistbands, accommodating various body types while ensuring comfortable fits. This versatility makes circle skirts ideal for both casual and formal occasions, cementing them as essential beginner projects.
Pencil Skirts for a Fitted Look
Once you’ve mastered circle skirts’ generous proportions, pencil skirts‘ll challenge you to work with fitted silhouettes that demand precision in measurement and construction.
This tailored garment requires accurate waist and hip measurements to achieve proper fit, with customization essential for individual body types.
You’ll benefit from these key considerations:
- Draft patterns using precise measurements, adjusting as needed for your specific dimensions
- Select knit fabrics that provide stretch while maintaining the sleek silhouette
- Apply zigzag stitches for flexible, durable seams that accommodate body movement
- Incorporate design elements like darts or side pockets for personalized style
These techniques guarantee you’ll create a chic, flattering pencil skirt that demonstrates your growing sewing proficiency while delivering a polished garment suitable for various occasions.
Wrap Skirts You Can Finish in an Hour
Wrap skirts offer an ideal next step in your sewing journey, combining beginner-friendly construction with the adjustable fit that pencil skirts demand but without their precision requirements. You’ll complete most wrap skirt projects in approximately one hour, making them practical for urgent wardrobe needs or thoughtful gifts.
Free patterns typically include multiple hem variations, enabling you to experiment with finishing techniques while developing your skills. The customizable waist sizing accommodates different measurements effortlessly, eliminating complex fitting adjustments that challenge novice sewers.
Select lightweight, breathable fabrics for best results in warm weather applications. These versatile garments layer effectively during cooler seasons, maximizing your finished piece’s functionality.
The straightforward assembly process, combined with pattern flexibility, establishes wrap skirts as an excellent choice for building confidence and expanding your sewing capabilities.
Gathered Skirts With Ease and Comfort
Gathered skirts build naturally on the foundational skills you’ve developed with wrap skirts, offering a slightly different construction approach that yields equally impressive results.
You’ll discover that gathered skirts provide distinct advantages for your sewing journey:
Gathered skirts offer distinct advantages for your sewing journey, from minimal fabric requirements to quick completion and customizable fits.
- Minimal fabric requirements: You’ll need just one yard, making this an economical project.
- Quick completion: You’ll finish your skirt in approximately one hour.
- Comfortable fit: You’ll gather fabric around the waistband, creating adjustability for various body types.
- Endless customization: You’ll enhance your design by adding pockets or varying lengths.
The construction process remains straightforward. You’ll gather fabric evenly around your waistband, then secure it with simple stitching.
Video tutorials and step-by-step guides make the process accessible. This project strengthens your gathering technique while building confidence in your expanding sewing skillset.
Common Mistakes Beginners Make (And How to Fix Them)
As you progress from mastering gathered skirts, you’ll encounter several predictable pitfalls that can compromise your final garment. Skipping accurate measurements for waist, hips, and length results in poor fit.
You’ll also want to avoid fabrics lacking sufficient stretch—medium weight knits and stretchy blends provide the comfort you need. Omitting seam allowances causes excessive tightness; include at least ½” for adjustments.
Pre-washing fabric prevents unexpected shrinkage that ruins your sizing calculations. Finally, don’t use straight stitches on elasticized materials; zigzag stitches accommodate fabric stretch and prevent seam breakage.
Where to Find Patterns and Build Your Sewing Confidence
Where can you find quality skirt patterns that’ll accelerate your sewing journey? You’ve got several reliable options at your fingertips:
- Established brands like Butterick, McCalls, and Simplicity offer free and paid patterns in multiple sizes.
- Printable patterns simplify cutting and enhance accessibility for novice sewists.
- Step-by-step tutorials with video demonstrations build your confidence through visual guidance.
- Online communities provide peer support, inspiration, and expert advice.
Beyond these resources, you’ll discover customization tools that let you adjust patterns to your unique measurements and preferences.
Engaging with fellow sewists through forums and social media groups creates accountability and motivation.
These platforms enable you to troubleshoot challenges, share your progress, and learn from experienced makers.
Frequently Asked Questions
How Do I Know if My Skirt Pattern Size Matches My Actual Body Measurements?
You’ll compare your body measurements against the pattern’s size chart, checking your waist, hip, and length dimensions. You should verify that your measurements fall within the pattern’s specified range for your chosen size.
Can I Adjust a Skirt Pattern if I’m Between Two Size Options?
You can absolutely adjust a skirt pattern between sizes by blending the grading lines between the two options. You’ll grade outward from the smaller size’s seams proportionally, tapering adjustments gradually across all pattern pieces for balanced fit.
What Should I Do if I Make a Cutting Mistake on Expensive Fabric?
You’ll want to assess the damage’s severity first. If it’s minimal, you can often reposition your pattern pieces to work around it. For major errors, consider salvaging fabric scraps for patches, bias binding, or repurposing them into complementary pieces like pockets or linings.
How Can I Prevent My Elastic Waistband From Rolling or Twisting During Wear?
Like a river confined by sturdy banks, your elastic won’t drift when you’re securing it through a casing with multiple anchor stitches. You’ll stitch vertically at side seams, distributing tension evenly, preventing rotation during movement.
Is It Better to Hem My Skirt Before or After Trying It On?
You’ll achieve better results by hemming your skirt after trying it on. This allows you to verify the correct length while wearing appropriate shoes, ensuring proper drape and accounting for any fabric stretching or settling that occurs during construction.
Conclusion
You’ve now mastered the foundational techniques for constructing beginner-friendly skirts. By systematically applying measurement precision, fabric selection parameters, and construction methodologies outlined throughout this guide, you’ll efficiently execute projects from conception to completion. Your skill development trajectory mirrors a typewriter’s mechanical progression—each keystroke building upon the previous one. Continue referencing established patterns, troubleshooting construction errors methodically, and progressively challenging yourself with advanced garment variations to solidify your sewing proficiency.