
Affiliate Disclosure: Some of the links in this post are affiliate links. This means we may earn a small commission if you make a purchase through these links—at no extra cost to you. We only recommend products and tools that we genuinely believe will help you with your sewing projects.
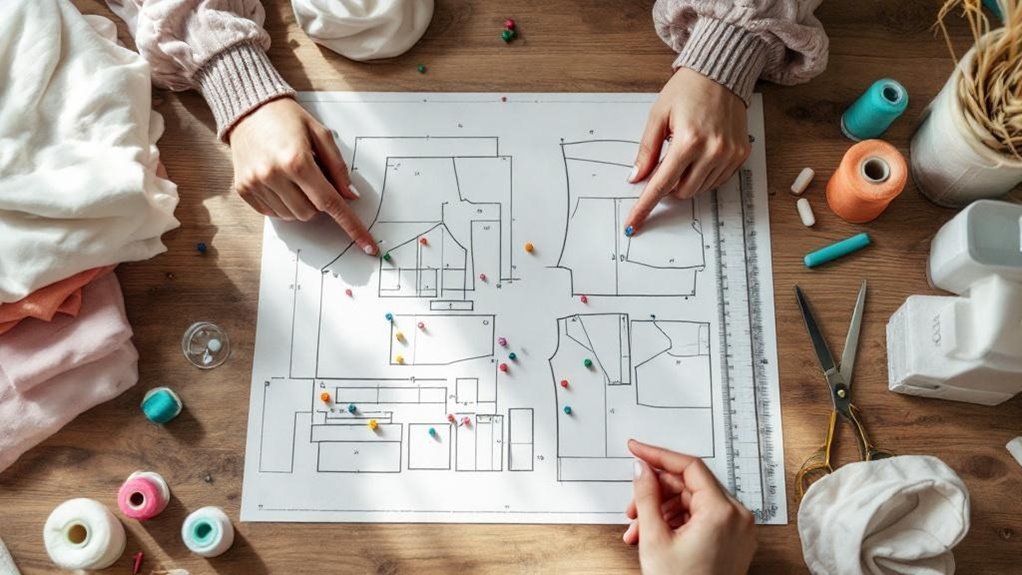
Start by examining your pattern envelope’s back for fabric suggestions, yardage amounts, and a detailed size chart. Take accurate body measurements wearing fitted clothing, then compare them against the chart to select your size. Study the pattern symbols—solid lines mean cutting, dashed lines mean stitching, and triangular notches guide alignment. Review the instruction booklet’s step-by-step assembly order and cutting layouts before you begin. Understanding these fundamentals sets you up for success as you explore more advanced techniques ahead.
Key Takeaways
- Understand pattern symbols: solid lines indicate cutting, dashed lines show stitching, and triangular notches mark alignment points.
- Take accurate body measurements using flexible tape while wearing fitted clothing to select the correct pattern size.
- Review the pattern instruction booklet’s glossary and seam allowance specifications before beginning the cutting and assembly process.
- Study the cutting layout diagram matching your fabric width to minimize waste and position pieces correctly on fabric.
- Start with beginner-marked patterns featuring simple silhouettes with minimal details to build foundational sewing skills successfully.
What’s Inside Your Sewing Pattern Envelope?
Your pattern envelope is a treasure map of everything you’ll need to complete your project successfully.
On the front, you’ll find illustrations of finished garment styles, showing you exactly what you’re creating. Flip it over to discover essential details: fabric suggestions tailored to the design, recommended yardage amounts, an extensive size chart, and the skill level required for each option.
On the front, discover finished garment illustrations. Flip over for fabric suggestions, yardage amounts, size charts, and skill levels.
You’ll also locate the cutting layouts that guide your fabric placement and a complete list of notions and trims necessary for construction. The size chart helps you match your body measurements to standard US sizing for accurate fitting.
Before you begin, familiarize yourself with these envelope details to match your fabric stash and sewing experience to the perfect pattern choice.
Pattern Sizes Aren’t Store Sizes: Here’s Why
Now that you’ve gathered your pattern envelope details, it’s time to address one of the most common surprises sewers encounter: pattern sizes don’t match store sizes. A store size 10 might correspond to pattern size 14 because commercial sewing patterns use body measurements—bust, waist, and hips—rather than standardized clothing sizes.
You’ll find a size chart on your pattern envelope that lists specific body measurements for each size. Consult this chart carefully by measuring yourself, then select the size matching your dimensions.
Many sewers discover they need different pattern sizes for different areas; you might choose bust size 12 but waist size 14 to fit your unique body shape.
This flexibility is handmade garments’ greatest advantage—you can grade between sizes and customize your fit precisely.
Taking Body Measurements That Match Your Pattern
Accurate body measurements are the foundation of a well-fitting garment, and you’ll need three key measurements to match your pattern: bust, waist, and hips. Use a flexible measuring tape while wearing fitted clothing or undergarments to capture your true measurements. Take each measurement snugly but not tightly, keeping the tape parallel to the ground.
Once you’ve recorded your measurements, compare them against the size chart provided on the pattern envelope. Select the size corresponding to your largest measurement—this guarantees proper fit across your body.
Before cutting fabric, review the finished garment measurements listed on the pattern. This tells you how much ease the design includes, helping you determine if the fit aligns with your preferences.
Taking time with accurate measurements prevents costly mistakes and ensures a garment that flatters your frame.
Using Finished Garment Measurements to Predict Fit
The finished garment measurements printed on the pattern envelope are your roadmap to understanding how a completed garment will fit your body.
Compare these measurements directly to your body measurements to determine whether the garment will be snug or loose once you’ve finished construction.
Different styles incorporate varying amounts of ease into their finished garment measurements.
Close-fitting designs have minimal ease, while looser styles provide substantially more room for comfortable movement.
When selecting a size, consider the intended wearing ease carefully, as it influences how the garment drapes.
If you fall between sizes on the size chart, blend between them using the finished garment measurements to achieve a customized fit that matches your preferences perfectly.
Decoding Pattern Symbols Without Confusion
Because sewing patterns use specialized symbols as visual shorthand for construction instructions, you’ll need to decode them accurately to avoid costly mistakes. Start by locating the legend or key included with your pattern—each brand uses different symbols, so don’t assume universal meanings.
Learn the basics: solid lines indicate cutting, dashed lines show stitching, and small triangles mark notches for aligning fabric pieces. These notches guarantee your pattern reading translates directly to proper alignment during assembly.
Familiarize yourself with grainlines, darts, and seam allowances before beginning.
Reference supplementary resources like instructional worksheets or images when confused. Taking time to understand these symbols upfront prevents errors, saves fabric, and builds your confidence in tackling future projects successfully.
What Grainlines, Fold Lines, and Notches Actually Do
You’ll align your grainline with the fabric’s lengthwise grain to prevent twisting and maintain the garment’s intended fit and drape.
Notches serve as precise alignment guides that help you match seams and design elements accurately during construction.
Fold lines show you where to position your fabric so you’re cutting symmetrical pieces that’ll come together perfectly when you sew.
Grainline Alignment for Proper Fit
While it might seem like pattern pieces are simply shapes to cut from fabric, they’re actually carefully engineered guides that work together to guarantee your garment hangs properly and fits as designed.
When you’re cutting, you’ll notice arrows marked on each pattern piece—these are grainlines. You must align them parallel to your fabric’s selvedge to assure ideal results. This alignment prevents twisting and sagging because fabric behaves differently across its grain directions. Without proper grainline alignment, your garment won’t hang correctly or maintain its intended shape.
Additionally, match the notches—small triangular marks on pattern pieces—to connect sections accurately during sewing. Together, correct grainline placement and notch alignment assure your finished garment fits beautifully and functions as intended.
Notches and Fold Line Matching
Many sewists overlook the small triangular marks and labeled fold lines on their patterns, yet these elements are just as critical as grainline alignment for achieving a well-fitted garment.
Notches function as aligning guides that match corresponding pattern pieces during assembly. You’ll cut these small triangular markings directly into your fabric, ensuring seams align perfectly when sewing.
Fold lines, marked “Place on Fold,” tell you where to position your pattern pieces on folded fabric, allowing you to cut symmetrical sections efficiently.
When cutting fabric, honor both notches and fold lines precisely. These markings prevent misalignment that distorts your finished garment.
Understanding Seam Allowances and How They Affect Fit
Three critical measurements—⅜ inch, ½ inch, and ⅝ inch—define most seam allowances, and they’re what separates a well-fitted garment from one that doesn’t work.
It’s important to know that seam allowance is the space between your fabric’s raw edge and the actual sewing line. When you’re reading cutting instructions, you’ll find specific seam allowance guidance that guarantees accurate measurements.
Missing or miscalculated seam allowances create size discrepancies that compromise your garment’s fit. You’ll need to transfer these allowances precisely when cutting pattern pieces.
Understanding seam allowances also empowers you to make fit preferences adjustments—add extra fabric in seams to accommodate design changes or personal needs. This knowledge transforms your finished garment from adequate to expertly tailored.
Spot Darts, Pleats, Gathers, and Other Details
You’ll find darts, pleats, and gathers marked on your pattern with specific lines and symbols that indicate exactly where and how to manipulate the fabric for proper shaping.
Once you’ve identified these markings, you must transfer them accurately onto your fabric using tailor’s chalk or a washable pen to guarantee correct alignment and assembly.
These transferred details guide your stitching and directly impact how well your finished garment fits and drapes on your body.
Identifying Pattern Markings
Before you cut into your fabric, you’ll need to recognize and interpret the various symbols printed on your pattern pieces. Pattern markings guide every step of construction, so understanding them prevents costly mistakes.
Small triangular notches mark alignment points where seams meet, ensuring precise stitching at critical junctures.
Darts appear as triangular symbols indicating where you’ll fold and sew fabric to create body-hugging contours at the bust, waist, or hips.
Pleats show directional arrows demonstrating which way you’ll fold the fabric for volume and texture.
Gathers feature dashed lines telling you where to pull threads and create ruffles.
These symbols represent the designer’s vision translated into construction language.
Study your pattern thoroughly, transfer markings accurately to fabric, and you’ll build garments with professional results and proper fit.
Transferring Details to Fabric
Accurate marking transforms pattern symbols into fabric guides that confirm your construction stays on track. You’ll need proper tools to transfer details effectively to your fabric.
- Use tailor’s chalk or washable fabric pens to mark darts, notches, and gather lines clearly without damaging your material.
- Transfer notches precisely—they’re crucial reference points confirming proper alignment when you’re sewing pieces together.
- Mark pleats with directional arrows showing how you’ll fold and sew the fabric for added volume and design interest.
When transferring details, identify all markings on a pattern first. Carefully reproduce darts as triangular markings where you’ll snip and fold for shaping.
Mark gather lines along edges like sleeves or skirts to create ruffled effects. These transferring details confirm accurate assembly and professional results.
Following Your Pattern’s Instruction Booklet Step by Step
When you’re ready to begin sewing, your pattern’s instruction booklet becomes your essential guide for success. Start by reviewing the pattern pieces list to understand what you’ll cut and how many of each piece you need.
Next, consult the glossary of symbols to decode markings specific to your sewing project. Pay close attention to seam allowance specifications, typically ⅜ to ⅝ inch, as these directly impact your garment’s fit.
| Step | Task | Purpose |
|---|---|---|
| 1 | Identify pattern pieces | Organize cutting process |
| 2 | Review symbols glossary | Understand markings |
| 3 | Note seam allowances | Maintain intended fit |
| 4 | Study visual aids | Clarify techniques |
| 5 | Follow assembly order | Confirm accurate construction |
Follow the step-by-step assembly order provided. Visual aids, including diagrams and illustrations, clarify complex techniques. This systematic approach confirms you construct your garment accurately and confidently.
Reading Cutting Layouts to Save Fabric and Prevent Mistakes
You’ll find that cutting layouts serve as your visual roadmap for positioning pattern pieces on fabric in the most efficient way possible.
By studying the diagram that matches your fabric width, you’re ensuring minimal waste while keeping all grainlines perfectly aligned for proper garment fit and movement.
Following the layout precisely and noting specific instructions like “Cut 1 on fold” or “Cut 2” guarantees you’ll have exactly the right pieces ready for assembly.
Understanding Cutting Layout Diagrams
Three key elements work together in cutting layout diagrams: they show you where to position pattern pieces on your fabric, they maximize how efficiently you’ll use your material, and they prevent costly cutting mistakes.
When you’re reading these diagrams, you’ll encounter visual markers that guide your placement decisions. Here’s what you need to focus on:
- Identify which pieces you’ll cut on the fold to save pattern pieces and fabric
- Locate the grainline arrows on each pattern piece to maintain proper fabric alignment
- Note the quantity needed for each component so you don’t miss any pieces
Pay attention to your fabric width—it directly impacts how you’ll arrange your pattern pieces.
If you need adjustments, modify your cutting layout while preserving grainline integrity and ensuring adequate fabric remains for your project.
Maximizing Fabric Efficiency
Now that you understand how to identify and position pattern pieces using visual markers, you’re ready to tackle the practical challenge of maximizing your fabric efficiency.
Cutting layouts serve as your blueprint for strategic placement. They show you how to arrange pattern pieces on your fabric to minimize waste while respecting the grain line. When you follow the cutting layout precisely, you’ll position each symmetrical piece correctly, preventing twisting or sagging in your finished garment.
Pay close attention to whether pieces should be cut on a fold or as separate sections—this distinction directly impacts how you maximize fabric usage.
Different sizes require different cutting layouts, so always select the layout matching your chosen size. By adhering to these guidelines, you’ll save fabric and eliminate costly re-cutting mistakes.
Mark Your Fabric So You Know Exactly Where to Sew
Several essential markings from your sewing pattern must be transferred to your fabric before you begin cutting and sewing.
You’ll want to use tailor’s chalk, fabric pens, or carbon paper for accurate transfers. These markings guide your entire construction process and prevent costly mistakes.
Accurate pattern transfers using tailor’s chalk, fabric pens, or carbon paper guide your entire construction and prevent costly mistakes.
Focus on marking these three critical elements:
- Notches and alignment points – Transfer small triangles or symbols that show you where to match pieces together correctly during assembly.
- Darts and shaping details – Mark dart positions precisely so you fold and stitch them accurately for proper garment fit.
- Cutting lines and grainlines – Clearly indicate these boundaries to maintain correct fabric orientation and prevent twisting or misalignment.
Always consult your pattern’s instructions for specific marking guidance.
This guarantees you’ll know exactly where to sew when construction begins.
Choose a Pattern Skill Level That Matches Your Experience
You’ll find beginner patterns designed with fewer pieces and simpler construction methods that teach fundamental sewing techniques without overwhelming complexity.
As you gain confidence, you can progress to intermediate patterns that introduce more intricate details like collars, zippers, and multiple pattern pieces to expand your skill set.
Advanced patterns challenge experienced sewists with sophisticated techniques, specialized fabrics, and complex design elements that require mastery of core sewing fundamentals.
Beginner Patterns for Starters
Selecting the right pattern skill level is fundamental to your sewing success. When you’re starting out, you’ll want to choose beginner-friendly options that won’t overwhelm you.
Focus on these key strategies:
- Select patterns with fewer pieces – Simple tops, skirts, and dresses require less assembly and reduce complexity considerably.
- Check pattern labels and line drawings – Look for designs marked “beginner” or “easy.” More lines on the envelope indicate greater difficulty, so choose simpler silhouettes with minimal details.
- Explore reliable sources – Both commercial patterns and indie brands offer beginner-friendly sewing patterns with clear instructions and step-by-step guides.
Additionally, opt for straightforward fastenings like zippers instead of buttons or intricate closures.
These choices guarantee your sewing journey starts smoothly, building confidence before tackling more advanced projects.
Intermediate Skills and Complexity
Before selecting an intermediate pattern, check the envelope’s recommended skill level and associated techniques. This guarantees you’re ready for the complexity ahead.
Don’t rush this step—confidence builds gradually as you progress through increasingly challenging projects.
If you’re unsure about specific techniques, leverage online tutorials that address those skills directly. These resources enhance your sewing proficiency considerably.
Advanced Techniques and Challenges
Once you’ve mastered intermediate techniques like zippers and collar construction, advanced patterns present the next level of complexity—one that demands precision, patience, and a thorough command of pattern reading.
You’ll encounter challenges that test your sewing proficiency:
- Pattern symbols and marking techniques require careful attention to detail, as intricate seams demand accurate interpretation of every notation.
- Garment assembly involves multiple construction steps where sequencing matters greatly for achieving professional results.
- Fit customization means blending different sizes across bust, waist, and hip measurements for ideal draping.
Advanced patterns feature detailed instructions that reward your dedication.
Consulting online tutorials and communities provides invaluable support when tackling unfamiliar techniques.
You’ll expand your sewing repertoire considerably, developing confidence in handling complex projects while refining your overall sewing proficiency.
Test Your Pattern Fit Before You Cut Into Real Fabric
Creating a muslin or practice garment is your best defense against expensive mistakes. You’ll test your fit using inexpensive fabric that mimics your intended material’s properties. Compare your personal measurements against the pattern’s finished garment measurements for bust, waist, and hips.
| Key Step | Action | Purpose |
|---|---|---|
| Align pieces | Match notches and markings | Ensure accurate placement |
| Sew seams | Follow pattern guidelines | Identify fit issues |
| Try on | Assess comfort and length | Determine needed adjustments |
Pay close attention to pattern pieces’ positioning throughout assembly. If adjustments are necessary, alter the pattern itself by grading between sizes or using lengthen and shorten lines. Document every change you make during this fitting process. These detailed notes will guide you when cutting and sewing your final fabric, guaranteeing the perfect fit.
Grade Between Sizes When Your Measurements Don’t Match One Size
Many sewers discover that their measurements don’t align perfectly with a single pattern size, and that’s where grading between sizes saves the day. You can blend sizes by cutting one size at the bust, then shifting to another size for the waist and hips.
Grading between sizes lets you blend patterns—cutting one size at the bust, then shifting to another for the waist and hips.
Here’s how to grade successfully:
- Consult your pattern size chart to identify which sizes best match your measurements at different points.
- Use a flexible ruler to draw smooth shift lines between sizes, maintaining the garment’s natural shape.
- Note design features like darts or princess seams that need adjusting during grading.
Before committing to your final fabric, create a muslin mock-up of your graded pattern. This test garment reveals whether your adjustments produce a well-fitting result, ensuring your measurements translate into a perfectly fitted garment.
Adjust Pattern Pieces If Your Test Fit Reveals Problems
Your muslin test fit will likely reveal adjustments you’ll need to make to achieve the perfect fit. When you’ve identified problem areas, trace your changes directly onto the tissue paper, carefully preserving all notches and markings for alignment.
Use the lengthen and shorten lines on pattern pieces to modify proportions evenly, particularly in bodices and sleeves. For bust or hip adjustments, add darts or make strategic slits, then spread the tissue to increase ease. Conversely, overlap pieces slightly for a smaller fit.
When adjusting the waist, taper side seams or refine with darts as needed. Document every alteration on a separate sheet to maintain consistency across all pattern pieces and guarantee accurate cutting when you’re ready to cut your final fabric.
Frequently Asked Questions
What Are Big 4 Patterns?
You’ll find Big 4 patterns from McCall’s, Vogue Patterns, Butterick, and Simplicity—the dominant commercial sewing pattern companies. They’re known for extensive size ranges, detailed instructions, and traditional designs catering to all skill levels.
Are Mccalls Patterns Being Discontinued?
You’d think McCalls isn’t discontinuing patterns, yet some designs are retired to make room for current trends. You’ll find newer collections regularly released, so you should follow their website for official updates on what’s available.
How to Read a Sewing Pattern to Know How Much Fabric to Use?
You’ll find the fabric amount chart on your pattern envelope. Match your size to the recommended yardage, then check the fabric width requirement—45″ versus 60″ affects how much you’ll need. You’re purchasing extra for modifications.
How to Learn Sewing for Beginners Step by Step?
You’ll start by selecting simple patterns like basic tops or skirts. You’ll take accurate body measurements, practice with inexpensive fabrics first, then follow step-by-step instructions carefully while using online tutorials for visual guidance.
Conclusion
You’re now ready to tackle any sewing pattern confidently. Remember Sarah, who’d sewn only pillows before? She followed these steps—checked her bust measurement, graded between sizes, and made a muslin test garment. When it fit perfectly, she confidently cut her fashion fabric and created a professional-looking dress. You’ll do the same by taking time upfront to understand your pattern and verify your fit before committing to expensive fabric.