
Affiliate Disclosure: Some of the links in this post are affiliate links. This means we may earn a small commission if you make a purchase through these links—at no extra cost to you. We only recommend products and tools that we genuinely believe will help you with your sewing projects.
There is a unique kind of magic in sewing your own clothes, but as many of us have discovered, the journey from paper to a finished garment can sometimes feel a little daunting. If you have ever spent hours at your sewing machine only to find that your finished pant pulls in the wrong places or feels looser than you intended, please know you are not alone. Pattern fitting is a skill that develops over time, and it is perhaps the most rewarding part of the sewing process.
Achieving a better fit isn’t about fitting your body to a sewing pattern; it’s about making the pattern adjustments necessary to respect your unique shape. In this tutorial, we will walk through the essential fitting techniques to help you adjust your pattern with confidence. Whether you are working with a new pattern or revisiting an old favorite, taking the time to make these changes will make a big difference in how you feel in your clothes.
Key Takeaways
Always make a muslin (test garment) before cutting into your fashion fabric.
Focus on one adjustment at a time to see how it impacts the drape.
Keep your grain line parallel to the center of the pattern piece to ensure the legs hang straight.
Pattern fitting is a problem-solving journey; be patient with yourself.
Setting the Foundation: Before You Sew
Before we pick up the scissors, we must start with a solid foundation. The first step in any pattern adjustment is getting the right pattern size. Most sewing pattern companies use a size chart that may not align with “ready-to-wear” sizing. Always choose the size that matches your largest measurement—usually the waist and hip for trousers—and then subtract or add where necessary.
Essential Tools for Pattern Fitting
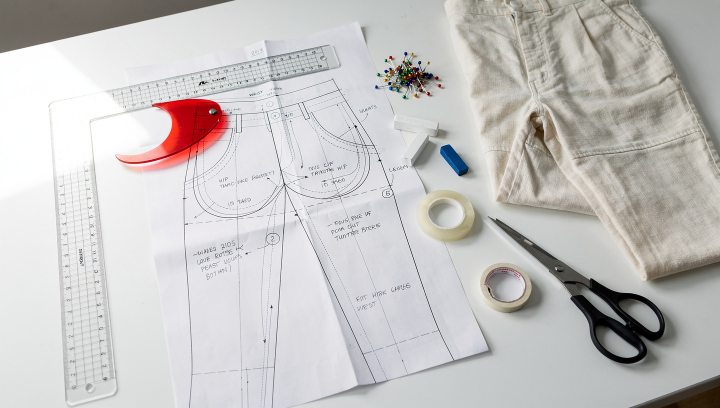
To adjust your pattern accurately, you will need a few specialized tools:
A ruler and drawing tools (a clear gridded ruler and a French curve are best).
Tracing paper or parchment paper to keep the original pattern intact.
Paper scissors.
Clear tape.
Extra paper underneath for filling in slashed areas.
“Fitting is a conversation between the fabric and the body. Listen to where the fabric pulls or bunches; it is telling you exactly where it needs more or less room.”
Understanding the Crotch Adjustment and Length
The crotch curve is often the most intimidating part of a pant pattern, but it is simply a matter of length and shape. If the crotch is too short, you’ll feel a restrictive tightness; if it’s too long, you’ll see excess fabric pooling.
How to Lengthen or Shorten the Rise
If you find that the waistband sits too low or too high, you need to adjust the rise. Most patterns have a “lengthen/shorten” line. To lengthen, slash along this line and spread the pattern piece apart. Place paper underneath and tape it down, ensuring the center front and back leg seams remain aligned. To shorten, simply fold the pattern at this line by the desired amount and redraw the side seam.
Refining the Crotch Curve
Sometimes the total length is fine, but the shape is wrong. If you feel tightness only at the very bottom of the curve, you may need to add a small extension to the crotch point. Use your ruler and draw a slightly longer extension, tapering it back into the inner leg seam.
The Flat Seat Adjustment
A flat seat adjustment is one of the most common fit adjustments for those who find excess fabric bagging under the buttocks on the back leg. This happens when the original pattern is drafted for a more rounded shape than yours.
Steps for a Flat Seat Adjustment:
On your back leg pattern piece, identify the area where the fullness sits.
Make a mark about halfway down the crotch curve.
Draw a horizontal line from this mark to the side seam.
Slash along this line from the crotch to the side seam, leaving a tiny paper hinge at the seam.
Overlap the upper part of the pattern over the lower part. This will shorten the back crotch length and remove the roomy pocket of air.
Redraw the crotch curve to smooth it out.
Waistband and Hip Fit Adjustments
The relationship between the waist and hip is where many sewists find they fall between sizes. If you have a narrow waist but wider hips, you might find a gape at the back of your waistband.
Grading Between Sizes
If your measurements span across multiple sizes on the size chart, don’t worry—this is normal! You can redraw the side seam to blend from one size at the waist to another at the hip. Use a long, smooth curve to connect the points, ensuring the drape remains natural.
Eliminating the Waist Gape
To fix a gape, you can often add or deepen a dart. If the original pattern doesn’t have a dart, or if it isn’t enough, you can pivot the pattern at the hip to bring the waist in.
| Fit Issue | Symptom | Adjustment Needed |
| Tightness at Hip | Horizontal pull lines | Add width at side seam |
| Gape at Waist | Waistband stands away | Increase dart intake or pivot |
| Excess fabric at Seat | Baggy back leg | Flat seat adjustment |
| Hem too long | Hemline drags | Shorten at lengthen/shorten line |
Ensuring the Grain Line and Seam Allowances
One of the most critical fitting techniques is maintaining the grainline. If your grain line is not still straight and parallel to the center front, the pant leg will twist around your leg as you walk.
When you adjust your pattern by slashing and spreading, always check that your grainline hasn’t been skewed. If it has, use a long ruler and draw a new pattern grainline based on the original’s orientation relative to the hem.
Dealing with Seam Allowances
Remember that most sewing patterns include seam allowances. When you are making small adjustments, it is often easier to work on the seam line rather than the cutting line. If you are tracing your pattern, consider tracing the stitch line so you can clearly see the one size you are working with without the distraction of the extra margin.
The Importance of Muslins
Your fitting journey should always include a test garment, often called a muslin. You don’t need to sew a perfect version; use a cheap fabric with a similar drape to your fashion fabric.
Sew the main pattern pieces together using a long basting stitch.
Do not worry about the zipper or facings yet.
Put the test garment on and look in the mirror.
If you find areas that are too tight, slash the fabric and see how much it opens. That is the amount you need to add.
If it is too roomy, pin out the excess fabric. That is the amount you need to remove.
Refining the Leg and Hem
Once the waist and hip are settled, you can look at the hemline. Whether you are making a legging or a wide-leg trouser, the straight line of the side seam should fall directly down the side of your leg.
If the pant feels too wide, don’t just take it in at the side seam. Make sure to subtract equal amounts from both the side seam and the inseam to keep the leg centered. After you make a mark for your new width, redraw the lines using your ruler to ensure a smooth transition.
Expert Tips for Problem-Solving Fit
As you continue your sewing tutorials and practice, you will find what works for your specific body. Here are a few “mentor” tips to keep in mind:
Small Adjustments First: Sometimes a 1 inch change is all it takes. Don’t over-correct in the first pass.
Check the Armhole: While we are focusing on pants, remember that in jumpsuits, the armhole and the crotch depth are linked.
Free Fitting: Take advantage of free fitting resources and free patterns to practice your pattern adjustments without the pressure of ruining expensive fabric.
The Pivot Method: If you don’t want to slash your pattern, you can use the pivot method to add width by anchoring the pattern at a specific point (like the armhole or hip) and swinging the paper out.
FAQ: Frequently Asked Questions
How do I know if I need a flat seat adjustment?
If you see horizontal folds of excess fabric directly under your buttocks, or if the back leg feels very roomy even though the waist fits, you likely need to shorten the back crotch depth via a flat seat adjustment.
Can I adjust the pattern after I’ve already cut the fabric?
It is much harder to add width once the fashion fabric is cut. However, you can always remove fabric at the seam or add darts. This is why a muslin is so vital!
Why does my pant leg twist?
This usually happens because the grain line was not cut perfectly straight. When you adjust your pattern, ensure the grainline remains parallel to the center front and back of the leg.
What if I am between sizes?
Always sew for your largest measurement and then redraw the lines to meet the smaller size. It is much easier to take a garment in than to let it out.
Conclusion: Embracing the Fitting Journey
Mastering pattern adjustments is a journey of problem-solving and self-discovery. By learning how to adjust your pattern, you are giving yourself the gift of clothes that truly fits well. Don’t be afraid to slash into that original pattern (or a traced copy!). Each adjustment you make—whether you lengthen, shorten, or redraw a curve—is a step toward a wardrobe that makes you feel incredible.
Take your time, make a muslin, and remember that even the most experienced sewists started exactly where you are today. Happy sewing!