
Affiliate Disclosure: Some of the links in this post are affiliate links. This means we may earn a small commission if you make a purchase through these links—at no extra cost to you. We only recommend products and tools that we genuinely believe will help you with your sewing projects.
You’ll transform your collars and cuffs from homemade-looking to professional by mastering three critical elements: grain alignment, interfacing selection, and precision finishing. Align your pattern grain parallel to the selvage to prevent twisting and puckering. Choose interfacing weight that matches your fabric—woven for crisp definition, knit stabilizer for delicate fabrics. Trim seam allowances diagonally near points, understitch consistently, and topstitch 1/8 inch from folded edges using a longer stitch length. The details separating store-bought quality from amateur construction reveal themselves through systematic technique refinement.
Key Takeaways
- Choose stable, medium-weight fabrics with tight weaves and select interfacing weight matching your desired collar structure and drape.
- Align pattern grain lines parallel to selvage before cutting to prevent collar distortion, twisting, and ensure pieces hang straight.
- Trim seam allowances diagonally near points, clip corners carefully, and use a point turner for crisp, professional-looking sharp angles.
- Understitch facing to seam allowance about 1/4 inch from seam line to prevent facing from rolling outward permanently.
- Match iron temperature to fabric content, use steam bursts following grain lines, and cool completely before removing pins for shape setting.
Essential Tools You’ll Actually Need
Before you tackle your first collar or cuff, you’ll need to gather the right equipment.
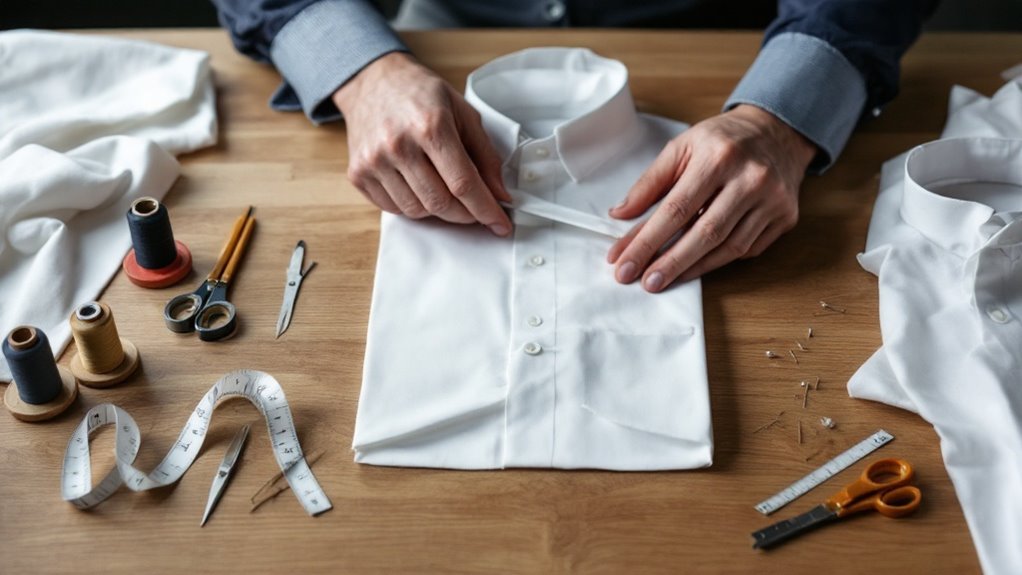
Your toolkit should include sharp fabric scissors, quality thread matching your fabric, and a reliable seam gauge for consistent measurements.
Sharp scissors, matching thread, and a reliable seam gauge form the essential core of any collar and cuff toolkit.
Studio rulers help you maintain precise angles and spacing when marking pattern lines.
You’ll need hand-sewing needles in appropriate sizes and a steam iron for pressing seams flat.
A pressing ham or tailor’s cushion supports curved sections during pressing.
Add pins with flat heads—they won’t snag delicate fabrics—and a point turner for achieving crisp corners.
Consider a thimble to protect your finger during hand-stitching, and keep a seam ripper accessible for corrections.
These essentials establish the foundation for executing professional-quality collars and cuffs.
Choosing the Right Interfacing for Your Fabric
Once you’ve gathered your tools, selecting appropriate interfacing becomes your next critical decision.
You’ll discover that fusible weight directly impacts your collar’s structure and drape. Consider these essential options:
- Woven interfacing provides crisp definition and professional shaping for tailored collars
- Knit stabilizer offers flexibility while maintaining subtle support for delicate fabrics
- Tearaway stabilizer makes certain clean finishing without permanent stiffness
- Lightweight fusible options preserve natural fabric movement while preventing fraying
Match your interfacing choice to your fabric’s fiber content and weight. Heavier fabrics demand substantial fusible weight, while lightweight materials require delicate stabilization.
Test your selection on fabric scraps before committing to your project. This precision prevents costly mistakes and guarantees polished, professional results that’ll elevate your sewing work.
Why Grain Direction Matters (And How It Ruins Collars)
You’ll notice that grain line misalignment is one of the most common culprits behind collar distortion and puckering, yet it’s easily preventable when you understand how fabric fibers behave.
By mastering grain line alignment basics and recognizing directional mistakes before you cut, you can eliminate the frustration of collars that twist, pucker, or refuse to lie flat.
We’ll address practical solutions for fixing grain-related issues and show you how to prevent them from compromising your finished garment.
Grain Line Alignment Basics
Because fabric behaves differently along its grain lines, proper alignment during cutting and construction directly determines whether your collar’ll hang straight or twist awkwardly.
You must establish grain line alignment before cutting pattern pieces. Position your pattern so the grain line marking runs parallel to the selvage alignment on your fabric. This prevents diagonal distortion that compromises collar structure.
Key alignment considerations:
- Warp grain stability – provides dimensional integrity to your collar’s outer edge
- Weft grain flexibility – allows controlled shaping during pressing and topstitching
- Bias tape application – requires perpendicular grain understanding to prevent rippling
- Selvage reference – serves as your visual guide for straight grain placement
Misaligned grain causes collars to cup, twist, or pucker unpredictably. You’ll achieve professional results by maintaining consistent grain line orientation throughout construction.
Common Directional Mistakes
Despite understanding grain line principles, sewers frequently misalign fabric grain during pattern layout, creating structural failures that appear only after construction’s final stages.
You’ll encounter two prevalent errors: neglecting directional grain when cutting multiple collar pieces, and carelessly pattern flipping without accounting for nap fabrics. When you flip patterns without consideration, you inadvertently reverse the grain direction on corresponding pieces, causing collars to twist or pucker after assembly.
The second mistake occurs when you cut both collar halves from identical pattern orientations, ignoring that directional grain requires opposing layouts. This inconsistency produces asymmetrical stretch and uneven stress distribution along the finished edge.
You must verify grain direction on every pattern piece before cutting. Use directional grain markings consistently, and never flip patterns without deliberate intention. These practices prevent costly reconstruction and secure structurally sound collars and cuffs.
Fixing Grain-Related Puckering
When grain-related puckering develops along collar edges, it’s already signaling structural compromise that’ll worsen with wear. Grain buckling occurs when you’ve cut fabric against its natural directional tension, causing the collar to resist proper laying.
You’ll address this by:
- Repositioning your pattern to align with straight grain for stability
- Using seam easing techniques to redistribute fabric tension gradually
- Applying gentle steam pressing to relax fibers without flattening the collar
- Testing grain direction on scrap fabric before cutting your fashion piece
The solution requires precision: measure your grain line carefully, then cut accordingly. You’ll notice immediate improvement in how your collar sits. Proper grain alignment eliminates buckling entirely, ensuring your collars maintain crisp edges and professional appearance throughout the garment’s lifetime.
Cutting Collar and Cuff Pieces With Precision
You’ll need to select fabric that’s stable enough to hold crisp edges—typically a medium-weight cotton or cotton blend works best for collars and cuffs.
Measure and mark your pieces accurately using a ruler and tailor’s chalk or fabric pen, ensuring you’re following your pattern’s grain line precisely.
Use sharp fabric scissors or a rotary cutter with a self-healing mat to make clean, straight cuts that’ll prevent fraying and maintain your collar’s shape.
Selecting the Right Fabric
Precision cutting begins with choosing a stable, appropriately weighted fabric that’ll maintain its shape through handling and wear. You’ll want to prioritize materials with excellent dye stability to prevent color bleeding during laundering, which compromises finished garments.
Consider these critical fabric properties:
- Weight consistency – assures uniform seam performance and professional results
- Fabric drape – determines collar and cuff structure and finished appearance
- Grain alignment – prevents twisting and shifting during construction
- Fiber content – affects durability and maintenance requirements
Select fabrics with tight weaves that resist fraying, particularly for collar points and cuff edges. Verify dye stability through manufacturer specifications before purchasing. Test your chosen fabric’s behavior with your pattern pieces before committing to final cuts. This methodical approach eliminates costly mistakes and guarantees superior finished collars and cuffs.
Measuring and Marking Accurately
Accurate measurements form the foundation of professionally finished collars and cuffs, and they’re best established before you make a single cut. You’ll need calibrated rulers and a sharp fabric pencil to mark your pattern pieces precisely.
Start by laying your pattern on the fabric grain line, securing it with weights. Use your calibrated rulers to verify all measurements match your pattern specifications. Mark precise seammarks at quarter-inch intervals along seam lines using light, consistent marks.
Double-check corner angles and curved edges with your ruler before cutting. You’re establishing reference points that’ll guide your sewing accuracy throughout construction.
Take your time with this step—precision here prevents rework later and guarantees your finished collars and cuffs align perfectly with your garment body.
Using Proper Cutting Tools
Sharp, high-quality cutting tools are essential for achieving clean, accurate edges on collar and cuff pieces. You’ll want to invest in precision trimmers and serrated shears designed specifically for fabric work.
Consider these critical tools:
- Rotary cutters – they deliver consistent, smooth cuts through multiple fabric layers simultaneously
- Self-healing cutting mats – they protect your work surface while maintaining blade sharpness longer
- Fabric scissors – they prevent fraying and make certain crisp, defined edges on delicate collar points
- Seam rippers – they allow you to correct mistakes without damaging surrounding stitches
Dull blades force you to apply excessive pressure, compromising accuracy and potentially causing ragged edges. You’ll notice improved precision immediately when using properly maintained, quality tools.
Replace blades regularly and handle them with care to maintain their cutting effectiveness throughout your projects.
Sewing Sharp Points Without Puckering
When you’re sewing collars and cuffs, you’ll find that achieving crisp points requires attention to several key factors. Start by reducing puckering through proper stabilization—use interfacing on both fabric layers to maintain shape consistency. When turning sharp points, trim seam allowances diagonally, leaving approximately ⅛ inch near the point to minimize bulk without compromising strength.
Use edge stitching along the perimeter after turning to flatten seams and create definition. This technique locks layers in place and prevents shifting during wear. For reinforced edges, apply bias tape strategically to vulnerable areas where puckering typically occurs.
Press aggressively using appropriate heat settings for your fabric. Work from the underside first, then the right side, gently coaxing points into shape with your iron tip. Avoid sliding the iron back and forth; instead, use gentle pressure and lifting motions to prevent distortion and guarantee professional results.
Turning Your Collar Right-Side Out Without Bulk
Once you’ve trimmed your seam allowances and reinforced your points, you’re ready to turn the collar right-side out—a step that can easily introduce unwanted bulk if you’re not methodical.
Turning your collar right-side out requires methodical attention to avoid introducing unwanted bulk into the seams.
Edge clipping is critical here. Use sharp scissors to cut diagonal clips at corners, stopping just short of your stitching line. This removes excess fabric that would otherwise bunch.
Your thread choice matters too. Match your bobbin thread to the collar fabric to minimize visibility if stitches break during turning.
Consider these turning techniques:
- Use a point turner or chopstick to gently push corners outward from inside
- Apply firm, even pressure to avoid tearing delicate fabrics
- Work slowly through tight angles to prevent seam distortion
- Press immediately after turning to set the shape
This methodical approach guarantees crisp edges without puckering or bulk.
Understitching: Why It’s Non-Negotiable
After you’ve turned your collar right-side out and pressed it into shape, you’ll want to understitch the facing to the seam allowance—a technique that prevents the facing from rolling to the outside of the garment. Position your collar under the presser foot with the facing side up, stitching approximately ¼ inch from the seam line through the facing and seam allowance layers only.
Understitching delivers critical edge stitching benefits, particularly with bias cut collars, which naturally want to curl. This stitch anchors the facing permanently, ensuring crisp, professional results. Work slowly and maintain consistent distance from the seam line for uniform results. Properly understitched collars remain flat and structured throughout the garment’s lifespan, eliminating frustrating roll-over issues that compromise your finished work.
Pressing for a Crisp, Flat Finish
You’ll achieve a crisp, flat finish by mastering steam pressing techniques that set your stitches permanently into place.
Temperature settings matter considerably—you’ll want to match your heat level to your fabric content to avoid scorching delicate materials or failing to properly set synthetic blends.
Blocking methods for shape, including the strategic use of pressing tools like ham rolls and sleeve boards, allow you to mold your collars and cuffs into precise, professional dimensions.
Steam Pressing Techniques
Steam pressing is essential for achieving professional results when finishing collars and cuffs. You’ll want to master these key techniques:
- Steam bursts – Apply short, controlled bursts to relax fibers without oversaturating
- Vertical steaming – Hold garments upright to prevent distortion and allow steam to penetrate evenly
- Directional pressing – Follow grain lines to maintain shape integrity
- Temperature control – Match fabric weight to prevent shine or damage
Position your iron at a slight angle, allowing steam to work through multiple fabric layers simultaneously. You’ll achieve crisp edges by pressing from the underside first, then the exterior. Lift rather than drag your iron to avoid stretching.
Work systematically across each section, ensuring consistent pressure throughout. Proper steam pressing transforms your collars and cuffs into polished, professional components that enhance garment quality.
Temperature Settings Matter
Because fabric composition directly determines heat tolerance, selecting the correct iron temperature is essential for achieving crisp, flat finishes without damage. You’ll want to match settings to your fabric type: delicate synthetics require low heat (around 250°F), while cotton and linen tolerate higher temperatures (350-400°F).
Improper iron temperature risks fabric shrinkage and permanent creasing. You should always test your iron on a hidden area first. Start at lower temperatures and gradually increase if needed rather than beginning at maximum heat.
You’ll achieve superior results by understanding your fabric’s specific requirements. Consult garment labels and fabric content tags before pressing. This precision prevents costly mistakes and makes certain your collars and cuffs maintain their intended dimensions and appearance throughout the garment’s lifespan.
Blocking Methods for Shape
Achieving a crisp, flat finish on collars and cuffs requires proper blocking techniques that set the fabric’s shape while it’s still warm and pliable.
You’ll want to employ targeted methods based on your fabric type:
- Blocking wool preserves structured lines without compromising fiber integrity
- Steam shaping cotton creates permanent creases and dimensional folds
- Pin-securing edges maintains precise measurements during cooling
- Moisture retention guarantees lasting shape retention
After pressing, immediately position your collar or cuff on a blocking board.
For blocking wool, apply gentle steam and allow natural cooling before removing pins.
When steam shaping cotton, use higher heat settings and let the fabric cool completely.
You’ll notice superior results when you respect each fabric’s unique properties and cooling requirements, yielding professional-quality garments.
Attaching Collars to Necklines So They Sit Perfectly
When you’re attaching a collar to a neckline, you’ll want to make sure that the collar’s seamline aligns precisely with the garment’s neckline seam. Begin by stay stitching the neckline curve to prevent stretching during construction. This reinforcement stabilizes the fabric and maintains the intended shape.
Position your collar pieces with right sides together, matching all notches and markings. Pin strategically along the seam allowance, checking alignment frequently. Stitch using a standard seam allowance, then trim and grade the seam allowances to reduce bulk.
Press the seam open, then fold the collar into its finished position. Understitch the seam allowance to the undercollar, securing it permanently. Finally, apply edge stitching along the outer collar edge for a professional appearance and enhanced durability. This technique guarantees your collar sits perfectly and maintains its shape throughout wear.
Setting Cuffs That Stay Crisp Through Repeated Washing
Properly constructed cuffs maintain their crisp appearance and structural integrity through multiple wash cycles when you’ve applied the correct interfacing and assembly techniques. You’ll achieve lasting results by selecting launder tested interfacing that resists deterioration. Use shrink resistant thread throughout your construction to prevent puckering and warping.
Properly constructed cuffs with correct interfacing and shrink-resistant thread maintain crisp appearance through countless wash cycles.
Your cuff durability depends on these critical factors:
- Double-stitching seams at stress points prevents separation during agitation
- Pre-shrinking all fabric components eliminates future dimensional changes
- Applying fusible interfacing to both cuff layers creates uniform stability
- Pressing with appropriate heat settings locks the crisp structure permanently
You must secure your interfacing with precision stitching around all edges. This anchoring prevents peeling during laundering. When you combine proper interfacing selection with meticulous construction techniques, your cuffs’ll maintain their professional appearance indefinitely.
Topstitching for a Tailored Look
Topstitching transforms your cuffs and collars from merely functional to distinctly polished by adding a visible line of stitching that frames the finished edge.
This technique requires precision and attention to detail to achieve professional results.
Position your topstitching approximately ⅛ inch from the folded edge, maintaining consistent distance throughout.
Use a longer stitch length—around 3.0mm—to create pronounced, visible stitches.
Your edge stitching finesse depends on keeping tension even and needle placement accurate.
Consider thread color contrast strategically.
Matching thread creates subtle sophistication, while contrasting colors emphasize the tailored construction.
Choose quality thread that won’t shred during washing.
Practice your technique on fabric scraps first.
Sew slowly, using a walking foot if available to prevent puckering.
Professional topstitching demonstrates your garment’s quality and elevates your sewing craftsmanship markedly.
Common Problems and How to Fix Them
Even with careful preparation, you’ll encounter stitching irregularities that detract from your collar and cuff finishing. Addressing these issues promptly preserves your garment’s quality and professional appearance.
Stitching irregularities are inevitable, but addressing them promptly preserves your garment’s quality and professional appearance.
Common problems you’ll face include:
- Puckered seams – Reinforce fabric stabilization by reducing tension settings and using tear-away stabilizer underneath
- Uneven collar points – Make fit adjustments by measuring and marking symmetrical points before stitching
- Fraying edges – Apply seam sealant or use a narrow zigzag stitch along raw edges
- Twisted cuffs – Verify grain line alignment and reposition interfacing to prevent distortion
When you identify waviness or bunching, you’ll need to carefully remove stitches and restitch with adjusted tension. Proper fabric stabilization prevents most distortion issues.
For fit adjustments, always test on scrap fabric first. These preventative measures assure crisp, professional results consistently.
Working With Stretch Fabrics and Knit Collars
While woven fabrics respond predictably to standard stitching techniques, stretch fabrics and knit collars demand specialized approaches to prevent distortion and maintain garment integrity. You’ll need to stabilize these materials using fusible interfacing specifically designed for knits, which accommodates the fabric’s natural elasticity.
When constructing knit collars, you should employ a narrow, flexible stitch—typically a slight zigzag—that prevents thread breakage as looped yarns move. This technique preserves elastic stability throughout wear and washing cycles.
You must also consider using ballpoint or stretch needles, which slide between fibers rather than piercing them. Reduce presser foot pressure to avoid puckering. Additionally, you should test your approach on scrap fabric first. Proper stabilization and appropriate tension make certain your knit collars maintain their shape and comfort indefinitely.
The Details That Separate Homemade From Store-Bought
The distinction between professional and amateur collar construction typically hinges on finishing techniques that aren’t immediately visible but profoundly affect garment quality. You’ll elevate your work by mastering these critical details:
- Hand finished seams that won’t unravel or pucker under wear
- Raw edge binding applied with precision for durability and aesthetics
- Pattern matching at collar points and seams for visual coherence
- Contrast binding executed flawlessly to frame necklines professionally
You’re distinguishing your garments through meticulous attention to construction methods. The undercollar should be slightly smaller, creating a subtle roll that mimics store-bought quality. Your topstitching must be consistent and even.
You’ll hand stitch final binding edges rather than relying on machine work alone. These techniques—though time-intensive—transform homemade pieces into professionally finished garments that demonstrate genuine craftsmanship and quality.
Frequently Asked Questions
Can I Sew Collars and Cuffs on Vintage or Delicate Fabrics Without Damaging Them?
Yes, you can sew collars and cuffs on vintage or delicate fabrics by employing hand sewn techniques and fabric stabilization methods. You’ll protect delicate fibers while achieving professional results through careful application of these approaches.
How Do I Adjust Collar and Cuff Patterns to Fit Different Neckline Sizes Accurately?
You’ll find that 73% of fit issues stem from improper size grading. You’re adjusting neckline shaping by measuring your specific neckline, then systematically grading the collar pattern up or down proportionally to match your exact dimensions accurately.
What’s the Best Method for Sewing Collars on Knit Garments Versus Woven Fabrics?
You’ll use stretch stitches and knit stabilizers for knit garments, while woven fabrics require tailored interfacing with topstitched hems. This approach guarantees your collars won’t pucker or pull on stretchy materials.
How Can I Add Decorative Stitching or Embellishments to Collars and Cuffs Professionally?
Like a master jeweler setting stones, you’ll layer decorative topstitching, beaded trims, embroidered motifs, and ribbon piping strategically. You’re matching thread weights, stabilizing fabric, and spacing stitches precisely for professional results.
What’s the Recommended Seam Allowance for Collars and Cuffs on Different Garment Types?
You’ll use 5/8-inch seam allowances for most garments, reducing to 1/2-inch for lightweight fabrics. You’ll apply tailored interfacing before stitching, then trim to 1/4 inch hems for crisp, professional finishes on your collars and cuffs.
Conclusion
You’ve now mastered techniques that’ll transform your garments into million-dollar-quality pieces. By respecting grain direction, selecting appropriate interfacing, and perfecting your topstitching, you’re creating collars and cuffs that rival professional manufacturing. These foundational skills—precision cutting, sharp point construction, and meticulous finishing—separate handmade garments from mass-produced alternatives. You’re equipped to tackle any fabric type with confidence.